How to Setup Cloudflare CDN for WordPress Blog (2020 Tutorial)
Using a Content Delivery Network is one of the best ways to reduce page loading time. There are numerous options to choose from, but Cloudflare stands out among the rest because of its exceptional service. What’s great, you can use it for free! Keep scrolling to learn how to set up Cloudflare on a Web Hosting.
What is Cloudflare CDN?
Cloudflare is a Content Delivery Network (CDN) that acts as a proxy between a website and the visitor. This system enables users to receive cached static content from the nearest servers. With shorter physical distance, the site can load faster.
What’s great about Cloudflare is that it has one of the biggest server networks in the world. As such, no matter where your visitors are, Cloudflare will help you deliver the fastest website experience. This surely will help to improve your site’s SEO as speed is one of the ranking factors in search engines.
Compared to traditional CDN, Cloudflare offers many other useful features:
- DDoS attack mitigation
- Analytics on all requests made to a website
- Easy SSL certificate installation
- Network gateway between protocols
You can read more at this article: https://cloudspace.vn/blog/how-cloudflare-works-explained/
Setting Up Cloudflare on WordPress
Installing CloudFlare on WordPress is a straightforward process. Follow the guide below to know how to do it:
Step 1: Creating a Cloudflare Account
- Navigate to the Cloudflare website and click the Sign-Up button in order to create an account.
- Provide your email and password and then hit Create Account.
Step 2: Adding Domain Name to Cloudflare
Go to your Cloudflare dashboard. Select the +Add Site button below a notification that reads “You currently don’t have any websites.”
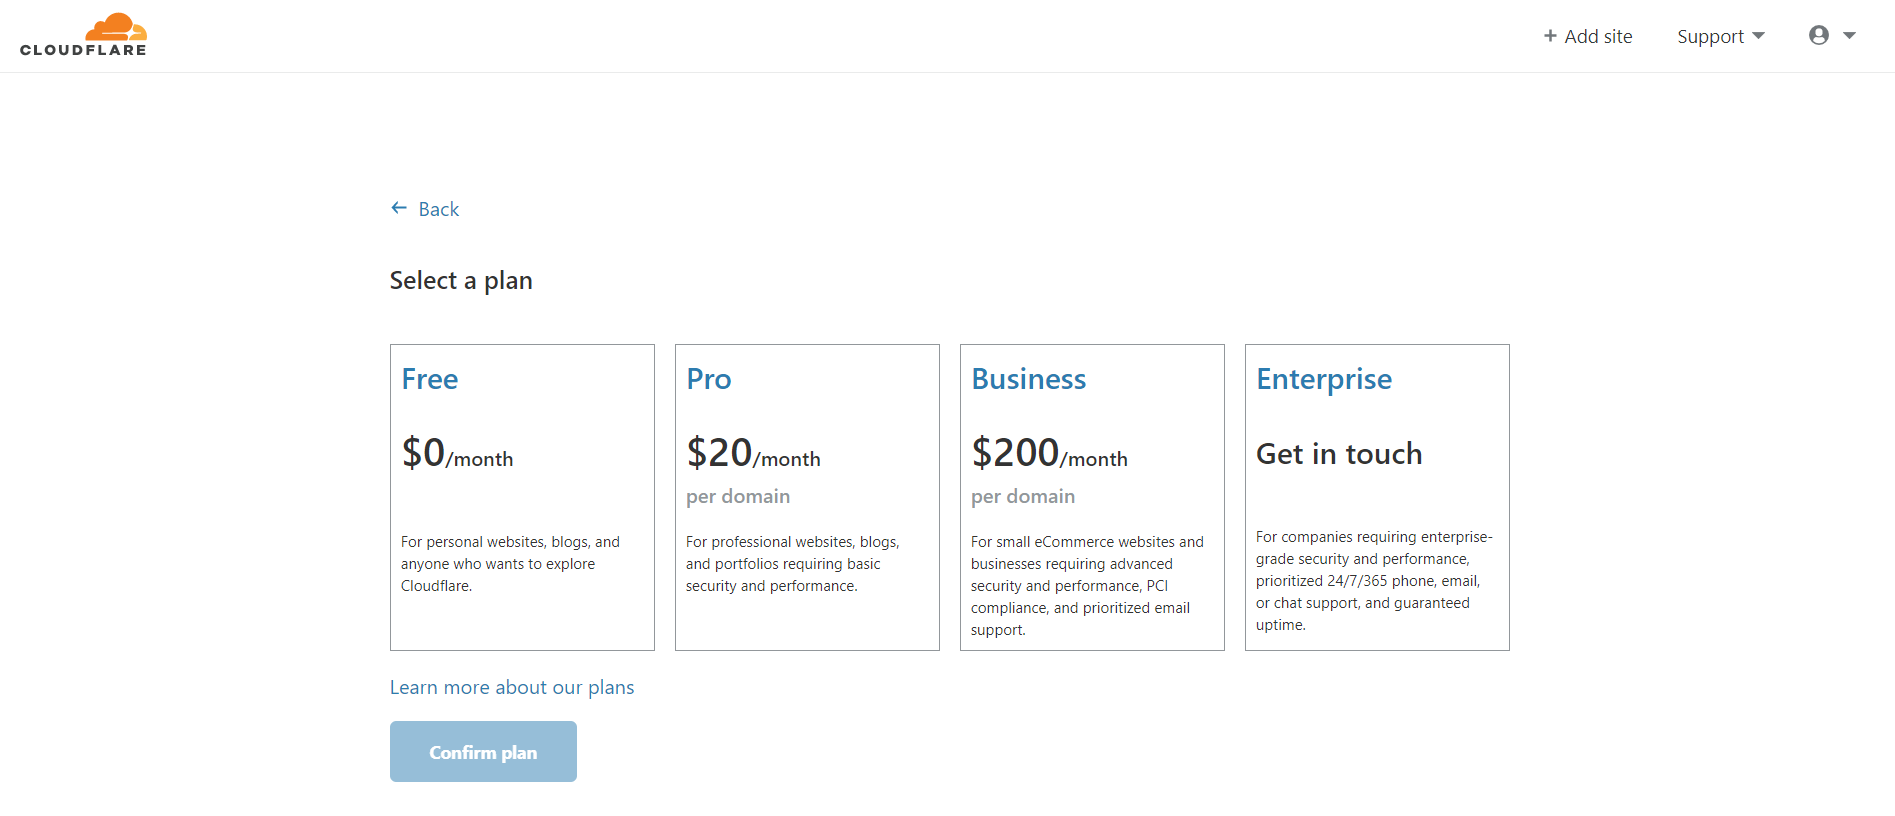
Now, select your plan. If it’s for a personal site, we recommend you to choose the free plan. Otherwise, choose the Pro or Business plan for business websites.
Step 3: Checking the DNS Records of Your Domain Name in Cloudflare
Once your WordPress site is added, you’ll be prompted with the DNS details of your domain name. In this step, you can enable or disable Cloudflare for specific subdomains.

To activate, simply toggle the cloud to orange.
We highly suggest that you enable Cloudflare for your naked domain name and www subdomain. This way, it will work on both www and non-www versions of your site.
Once you are done, press the Continue button to proceed to the next step.
It’s not recommended to enable CloudFlare for cPanel, mail, FTP, or any other subdomains as it can result in various DNS issues.
Step 4: Pointing Your Domain Name to Cloudflare Nameservers
After activating Cloudflare for your domain and subdomains, you will be greeted with Cloudflare nameservers on the next page. Now, we need to replace your old nameservers with Cloudflare’s.
- Open a new browser tab and visit your hosting control panel. If you’re a Hostinger user, you can find the detail of your nameservers in the Domains tab.

- Replace the existing nameservers with those from Cloudflare. Don’t forget to click Update.
- Go back to the Cloudflare page and press the Done, check Nameservers button.
Note that it may take up to 72 hours for DNS to propagate worldwide. Once the nameservers update has been completed, you will receive an email confirmation message from Cloudflare.
Alternatively, you can also check status on the Cloudflare website. During this process, your page will not face any downtime.
Step 5: Installing and Configuring Cloudflare Plugin on WordPress
To complete the whole process, we need to install the Cloudflare plugin on WordPress. The tool comes with various handy features to manage the CDN, such as:
- One-click WordPress optimization
- Web application firewall (WAF) rulesets
- Automatic cache purge
- Statistics
- Built-in Cloudflare settings for easy modification
Let’s proceed with the plugin installation.
- Access your WordPress dashboard and head over to Plugins -> Add New. Search for Cloudflare, then install and activate the plugin.
- Go to Settings and select Cloudflare.
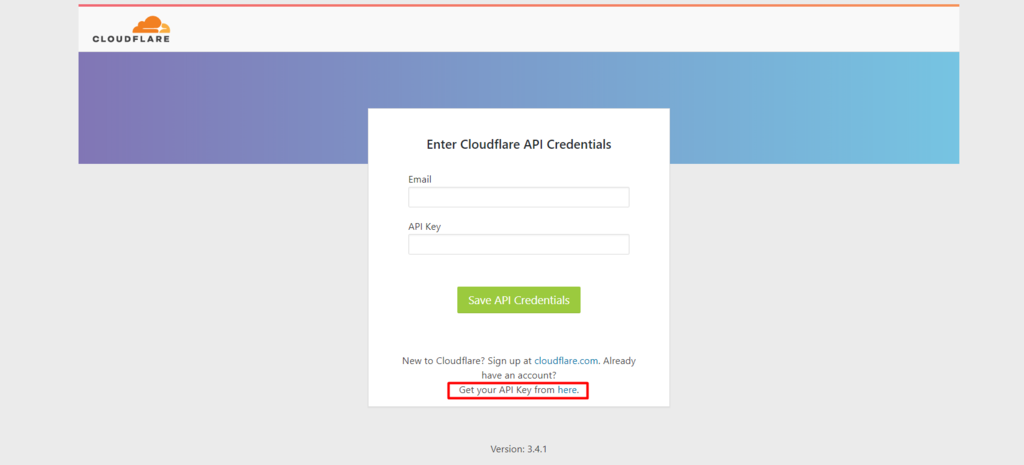
- Select the get your API Key from here option, located below the log in fields.

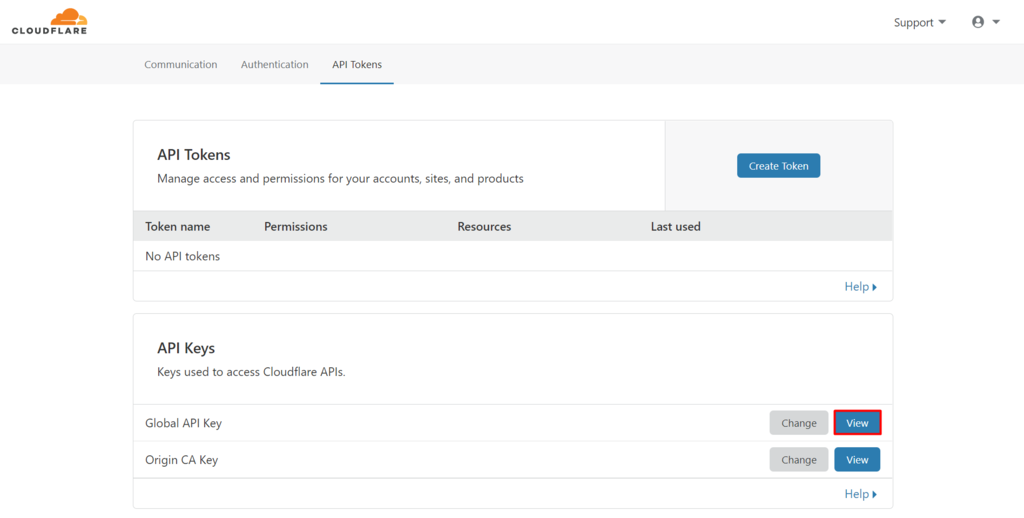
- A window that opens your CloudFlare account will pop up. Go to the API Tokens tab, then, select View from the Global API option.

- Enter your Cloudflare password, and then copy the provided API key.
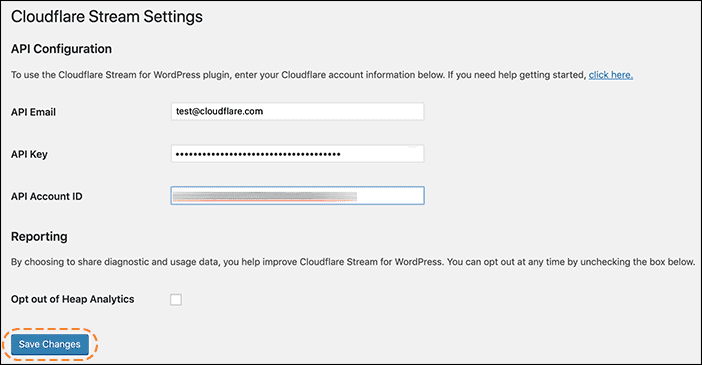
- Go back to the plugin’s settings page, and paste the key to the login fields. Hit the Save API Credentials button.

After you log in to the Cloudflare plugin, you will see several settings:
- Optimize Cloudflare for WordPress — enable it by clicking the “Apply” button. It will implement Cloudflare recommended settings for the best performance.
- Purge Cache — activate this service only after you update your WordPress or website design. This setting will clear all the cached content of your site.
- Automatic Cache Management — automatically clear all Cloudflare cache every time you switch or edit the theme.
Conclusion
CDN, or Content Delivery Network, is an important service that will help you boost your website speed. Out of so many options, we recommend you to use Cloudflare. It offers a reliable CDN service, as well as security and performance improvements.
What’s cool, you can set up Cloudflare on WordPress for free, as we have explained above. To summarize, here’s how you do that:
- Create your Cloudflare account.
- Add your domain name to Cloudflare.
- Check the DNS records of your domain name in Cloudflare, and then activate the service for your naked and www domains.
- Point your domain name to Cloudflare nameservers.
- Install WordPress Cloudflare plugin for easy configuration.
With the help of Cloud Space, you don't have to do these steps, we will do everything for you.
That’s it, good luck and enjoy your faster website!
To learn more about the benefits and our managed services on Hostinger, please contact Cloud Space for advice:
- Hotline: (+84) 86 980 5768
- LinkedIn: https://www.linkedin.com/company/cloudspacevn
- Website:
+ https://cloudspace.vn
+ https://hybridcloud.com.vn
+ https://publiccloud.com.vn